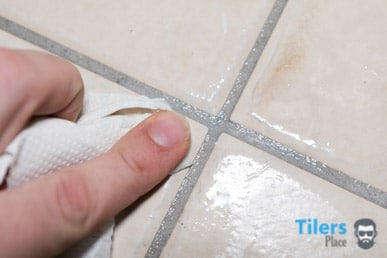
Imagine this: you’ve just finished a stunning tile renovation, the gleaming floor a testament to your hard work. But then, a few months later, you notice it. The once vibrant grout is now stained, discolored, and harboring grime. It’s a common tale, and one that can leave you feeling frustrated and disheartened. The culprit? A lack of proper sealing. But fret not! This guide will walk you through the best way to seal floor tile grout, ensuring your beautiful tile work remains pristine for years to come.

Image: tilersplace.com
Sealing grout is an essential step in maintaining the beauty and functionality of your tile floors. It acts as a protective barrier against stains, moisture, and even mildew, keeping your floors looking their best for longer. It’s not just an aesthetic consideration, either. Sealing grout makes it easier to clean, preventing dirt and grime from becoming embedded, and also makes surfaces more resistant to bacteria and allergens.
Understanding Grout Sealing: A Deep Dive
What is Grout Sealing?
Grout sealing involves applying a protective coating to the grout lines between tiles. This coating penetrates into the pores of the grout, creating a barrier that prevents stains, moisture, and mildew from penetrating. The sealant acts like a shield, repelling dirt and grime while also protecting the grout from the wear and tear of everyday use.
Why is Grout Sealing Necessary?
Grout, particularly the porous type used in most installations, is quite vulnerable to staining, discoloration, and mildew growth. It’s a sponge for spills, dirt, and even airborne oils, leading to an unsightly and unsanitary surface. Sealing grout prevents this by filling the pores, making it more resistant to these problems.

Image: cinvex.us
Types of Grout Sealants
Two main categories of grout sealants dominate the market:
- Solvent-based sealants: These are typically more durable and offer better stain resistance. However, they can emit strong odors and require proper ventilation during application.
- Water-based sealants: These are easier to apply, have a milder odor, and are generally less toxic. While they offer good protection, they may not be as durable as solvent-based sealants in high-traffic areas.
When choosing a sealant, consider the type of grout and the level of traffic the area experiences. For high-traffic areas or surfaces prone to high moisture, a solvent-based sealant is often recommended. For lower-traffic areas, a water-based sealant may be sufficient.
Sealing Grout: The Step-by-Step Guide
1. Prepare the Surface
Before applying any sealant, it’s crucial to ensure your grout is clean and dry.
- Thorough Cleaning: Use a grout cleaner and a stiff-bristled brush to remove all dirt, grime, and debris.
- Drying: Allow grout to dry completely. Any moisture present can interfere with sealant adhesion.
2. Choose the Right Sealant
As mentioned before, the choice of sealant depends on the specific type of grout and the area’s traffic. Read product labels carefully to ensure compatibility.
3. Apply the Sealant
- Apply Generously: Use a brush or sponge applicator to apply a thin, even layer of sealant to the grout lines, making sure to coat them completely.
- Avoid Puddling: Exercise care to prevent sealant from pooling on the tile surface. Excess sealant creates a slippery hazard.
4. Allow to Cure
The sealant needs time to dry and cure properly. Follow the manufacturer’s instructions for curing time, which typically ranges from 24 to 72 hours. During this time, avoid walking on the sealed surface.
Tips from the Experts
Here are a few extra tips to optimize your grout sealing efforts:
- Test in an Unseen Area: Apply a small amount of sealant to an inconspicuous area to ensure it doesn’t discolor or react negatively with your tile.
- Multiple Coats: For enhanced protection, apply multiple coats of sealant, allowing each layer to cure before applying the next.
- Maintain Regularly: While not as frequent as the initial application, resealing every 12-24 months will prolong the effectiveness and beauty of your sealant.
- Specialty Sealants: For high-moisture areas like showers and bathrooms, consider using a sealant specifically designed for those applications.
Expert Advice
Remember that your grout is only as good as the sealant you use. Don’t be tempted to choose cheap, generic sealants. Invest in a high-quality product that’s specifically designed for your type of grout. A little extra cost at the outset can save you time, effort, and frustration in the long run.
Common Grout Sealing Questions Answered
Q: How often should I seal grout?
A: Ideally, grout should be sealed every 12-24 months, or whenever you notice its effectiveness waning. High-traffic areas may require more frequent resealing.
Q: Can I seal grout myself, or should I hire a professional?
A: Sealing grout is a relatively simple DIY project for most homeowners. However, if you’re unsure, or if you have a large area to seal, it’s best to seek professional assistance.
Q: What are the signs that my grout needs sealing?
A: If water beads up on the grout instead of soaking in, or if you notice stains, discoloration, or mildew growth, it’s a clear sign that your grout needs sealing.
Best Way To Seal Floor Tile Grout
Conclusion
Sealing floor tile grout is an essential maintenance step that ensures your floors stay beautiful and functional for years to come. By following this guide and incorporating the expert tips provided, you can easily achieve long-lasting results and prevent the dreaded discoloration and staining. Remember, choosing the right sealant and applying it correctly is essential for proper protection.
Are you ready to revitalize your tile floors and enjoy the benefits of properly sealed grout? Share your experiences with sealing grout in the comments below. We’d love to hear your tips and tricks!


/GettyImages-173599369-58ad68f83df78c345b829dfc.jpg?w=740&resize=740,414&ssl=1)


