Picture this: You’re enjoying a sunny afternoon, relaxing on your porch with a refreshing beverage. As you reach for your glass, a playful breeze carries a rogue pine cone straight towards your wooden floor. The impact sends a burst of sticky sap splattering across the beautiful surface, leaving you with a dismayed sigh.

Image: floorcarekits.com
Well, don’t worry! While sap can be a stubborn stain, don’t despair. With the right approach, you can effectively remove sap from your wood floors and restore their pristine beauty. This comprehensive guide breaks down the process, offering actionable tips and proven techniques to ensure a sap-free, gleaming floor.
Understanding the Enemy: Sap and Wood
Sap, the sticky, resinous substance produced by trees, poses a unique challenge to wood surfaces. It’s a mix of sugars, water, and various organic compounds, making it quite difficult to remove. The first step towards removing sap is to understand its composition and how it interacts with wood.
The nature of wood surfaces also plays a role. Depending on the type of wood and its finish, sap can penetrate differently. Softwoods, like pine and cedar, are more susceptible to sap absorption due to their porous structure. Hardwoods, on the other hand, with their denser grain, can offer some resistance.
Tackling the Sticky Situation: Step-by-Step Guide
Here comes the good part: a step-by-step guide that will walk you through the process of getting rid of those stubborn sap stains:
1. Immediate Action: Prevent Deep Penetration
The first few minutes after sap hits your floor are crucial. Time is your ally! Acting quickly can significantly reduce the chances of the sap seeping deeply into the wood.
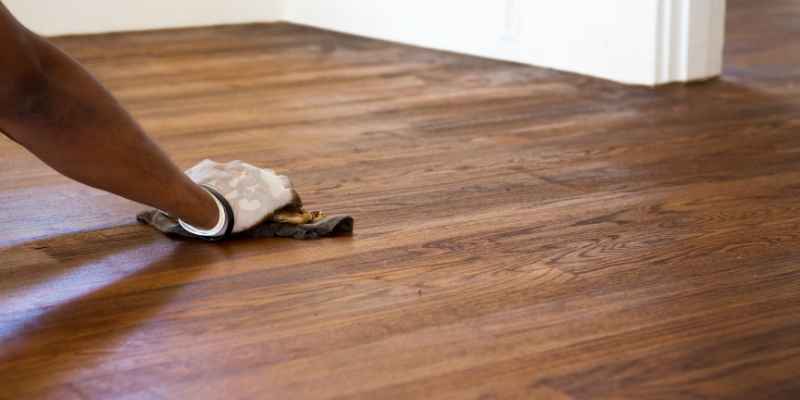
- Blot, Don’t Rub: Resist the urge to scrub! This will only push the sap deeper into the wood and make it harder to remove. Instead, gently blot the area with a clean, dry cloth or paper towel to absorb as much sap as possible.
- Ice it Up: For freshly spilled sap, applying a cold compress or ice cube can help solidify the sap, making it easier to remove.

Image: woodworkingadvisor.com
2. The Power of Patience: Let the Solution Work
There’s no need to rush! Many cleaning solutions need time to break down the sap effectively.
- Choose Your Weapon: A variety of cleaning solutions can be used to tackle sap stains. From gentle options like dish soap and warm water to heavier hitters like rubbing alcohol and mineral spirits, the right choice depends on the severity of the stain and the type of wood finish.
- Apply and Wait: Once you’ve selected your cleaning solution, apply a small amount to a clean cloth or cotton ball. Gently rub the solution over the sap stain, focusing on the edges and letting it sit for a few minutes. The waiting period allows the solution to break down the sap’s adhesive properties.
3. Scrub, Rinse, and Repeat (If Necessary)
With the cleaning solution working its magic, it’s time to gently remove the softened sap.
- Gently Does it: Use a soft-bristled brush or a non-abrasive scrub pad to gently scrub the surface. Avoid harsh scrubbing or abrasive tools, as these can damage the wood finish.
- Rinse, Repeat, and Reassess: Once you’ve scrubbed the area, rinse it with a damp cloth and inspect the stain. If it’s not completely gone, repeat steps 2 and 3.
4. Drying and Polishing: A Finishing Touch
The last step is crucial for ensuring your wood floor returns to its former glory.
- Dry Thoroughly: Make sure the cleaned area is completely dry. This prevents water marks from forming on the wood. Use a clean, dry cloth to absorb any excess moisture.
- Polishing and Protection: For a final touch, you can apply a wood polish or sealant to the cleaned area. This helps restore the shine and provides further protection against future stains.
Expert Insights: Pro Tips for Success
Here are some professional tips from seasoned wood floor experts:
- Prevention is Key: Preventing sap spills in the first place is the best approach. Place mats or rugs near entryways to catch debris.
- Test First: Before applying any cleaning solution to your entire wood floor, test it in an inconspicuous area to ensure it doesn’t damage the finish.
- Professional Help: If dealing with a stubborn sap stain or a large area, consider consulting a professional wood floor cleaning service.
How To Get Sap Off Wood Floor
Conclusion: A Sap-Free Floor Awaits
Armed with this knowledge, you can confidently face any sap-related mishaps on your precious wood floors. Remember, the key is to act quickly, choose the right cleaning solution, and be patient. With a little effort and the right approach, you’ll be able to restore your wood floors to their original beauty, making them shine brighter than ever before. So, go forth and reclaim your sap-free, gleaming floors!


/GettyImages-173599369-58ad68f83df78c345b829dfc.jpg?w=740&resize=740,414&ssl=1)


