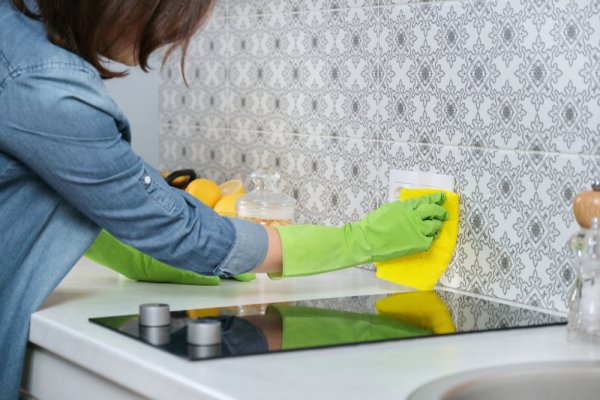
Picture this: You’ve just finished a delicious home-cooked meal, the aromas of your culinary creation still lingering in the air. You’re about to relax and enjoy the fruits of your labor, but then you notice it – a smudge of tomato sauce on your kitchen tile floor, a stubborn grease stain from a recent cooking adventure. It’s a common sight in many kitchens, a reminder that even the most beautiful tile floors need a little TLC to stay sparkling clean.

Image: kitchencarepro.com
Cleaning tile floors in your kitchen might seem like a mundane chore, but it’s actually a crucial step in maintaining a hygienic and visually appealing space. Your kitchen is the heart of your home, where meals are prepared, shared, and enjoyed. Keeping your tile floors clean not only enhances the aesthetic appeal but also protects your family’s health by eliminating potential bacteria and allergens. Let’s dive into the world of tile floor cleaning, armed with tips and tricks to make your kitchen floor shine like new.
Essential Tools for a Spotless Kitchen Floor
Before embarking on your tile cleaning journey, it’s essential to gather the right tools. Think of it as equipping your cleaning arsenal with the best weapons against dirt, grime, and stubborn stains. Here’s a list of essentials you’ll need:
- A High-Quality Mop: The cornerstone of any successful tile floor cleaning operation. Look for a mop with a microfiber head that absorbs dirt effectively and is machine-washable for easy cleaning.
- A Bucket: A trusty companion to your mop, holding your cleaning solution and allowing for comfortable rinsing.
- Microfiber Cleaning Cloths: These versatile cloths are excellent for wiping down tile grout and tackling tough stains.
- A Tile Cleaner: Choosing the right cleaner is key. We’ll explore specific cleaning solutions later in this guide.
- A Grout Brush: A specialty tool that effectively removes grime from tile grout lines, restoring their pristine look.
- A Vacuum Cleaner: Vacuuming your tile floors before each cleaning session effectively removes loose debris and dust, making mopping more efficient.
Preparation is Key: Getting Ready to Clean
Just like any well-executed task, preparing your kitchen tile floors for a deep clean is vital. It sets the stage for a successful cleaning operation, ensuring that your efforts yield the desired results. Here’s a step-by-step guide to ensure you’re ready to conquer those dirty tiles:
- Clear the Area: Before you start cleaning, it’s essential to make space. Remove all items from the tile floor, including furniture, rugs, and appliances. This ensures you can work freely and thoroughly clean every nook and cranny.
- Dust and Vacuum: The first step is to remove loose dirt and debris from the tile floor. Use a vacuum cleaner with a crevice attachment to efficiently reach those tight spaces between tiles.
- Pre-Clean With Water: Before introducing cleaning solutions, give your tile floors a preliminary wash with clean water. This will loosen dirt and grime that can be readily removed during the next stage.
The Nitty-Gritty: Cleaning Your Kitchen Tile Floors
Now we arrive at the heart of the matter: cleaning your tile floors. The key is to find the right cleaning solution that effectively tackles dirt, grime, and stains while being gentle enough to avoid damaging your tile surface.
Here are a few cleaning solutions that have stood the test of time:
- DIY Solution 1: The Vinegar Power: Combine white vinegar and water in a ratio of 1:1. This solution is a natural, cost-effective way to clean tile floors and can help remove soap scum and light grease stains.
- DIY Solution 2: Baking Soda and Water: Dissolve baking soda in warm water to create a paste. This solution is effective in removing stubborn stains like coffee or tea spills.
- Commercial Tile Cleaner: Look for commercially available tile cleaners that are specifically designed for your type of tile. These cleaners are formulated to tackle various stains and dirt effectively.
After you’ve chosen your cleaning solution, follow these steps:
- Pour the Cleaning Solution: In a bucket of warm water, mix your chosen cleaning solution. The amount of solution you add depends on the concentration and your preference.
- Apply the Cleaning Solution: Dip your mop into the cleaning solution and gently wring it out to avoid excessive dripping. Start at a corner of your kitchen and work your way systematically across the floor.
- Clean the Grout: Once you’ve mopped the entire floor, use a grout brush to clean the grout lines. You can use the same cleaning solution or a dedicated grout cleaner.
- Rinse the floor: After you’ve cleaned the grout and the tile surface, thoroughly rinse the floor with clean water to remove any remaining cleaning solution or dirt.

Image: bp-guide.in
The Spotlight on Grout: Essential Care for a Sparkling Finish
The grout lines in your kitchen tile floor can easily become dull and discolored over time, harboring dirt, grime, and even mold. If you want your tile floors to sparkle, it’s crucial to pay attention to those grout lines. Here are a few tips for keeping grout clean and bright:
- Regular Cleaning: Clean grout lines regularly with a grout brush and a cleaning solution. This prevents dirt build-up and keeps your grout looking fresh.
- Grout Sealer: Consider sealing your grout lines with a sealer. This protects the grout from stains and makes cleaning easier in the future.
- Whitening Agents: For discolored grout, use a grout whitening agent to brighten it up. These agents are available commercially and can restore the original color of your grout.
Expert Insights for Amazing Results
We’ve covered the basics of cleaning kitchen tile floors, but here are some expert insights that can help you achieve professional-level results:
- Invest in Quality Supplies: Don’t skimp on the tools you use. A high-quality mop, a sturdy bucket, and a reliable grout brush make a significant difference in the effectiveness of your cleaning.
- Don’t Forget the Baseboards: Cleaning your tile floors thoroughly includes cleaning the baseboards. A clean baseboard adds a finishing touch to your sparkling-clean floor.
- Prevention is Key: Prevent dirt and grime build-up by cleaning your tile floors regularly. A quick sweep or vacuuming after each meal or cooking session can make a significant difference.
How To Clean Tile Floors In Kitchen
Final Thoughts: Your Kitchen Floor, Your Sanctuary
Cleaning tile floors in your kitchen is an essential part of maintaining a hygienic and inviting space. By following these tips and tricks, you can ensure that your kitchen floor remains sparkling clean, adding to the overall beauty and functionality of your beloved kitchen. Remember, it’s not just about cleaning; it’s about creating a sanctuary where you can create memories and enjoy delicious meals with your loved ones.
So, grab your cleaning supplies, put on some music, and embrace the satisfaction of a job well done. Your kitchen floor will thank you, and your family will appreciate the inviting atmosphere you’ve created.


/GettyImages-173599369-58ad68f83df78c345b829dfc.jpg?w=740&resize=740,414&ssl=1)


