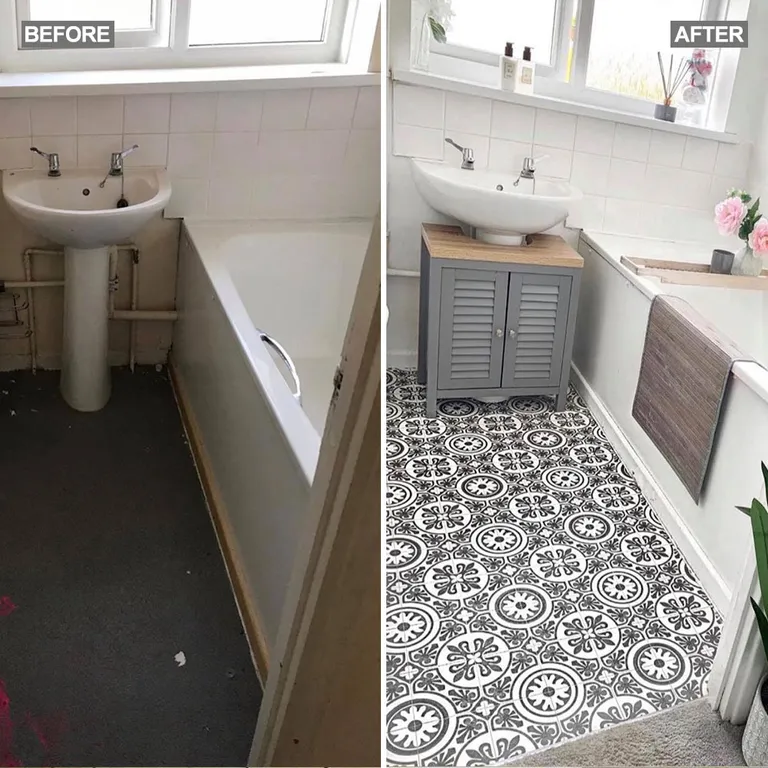
Renovating your bathroom can be a daunting task, especially when you’re dealing with the awkwardness of the toilet. Removing it might seem like the only option, but it can be a laborious process, involving plumbing and potential leaks. Thankfully, there’s a way to install vinyl flooring in your bathroom without going through the hassle of removing the toilet. You can achieve a beautiful and modern look while saving yourself a big headache.

Image: jjvs.org
I remember when I decided to revamp my bathroom. The grout was discolored, the tiles were worn, and the whole space felt dated. I envisioned sleek vinyl flooring, but the thought of dealing with the toilet felt overwhelming. However, after some research and a little elbow grease, I discovered that it’s absolutely achievable! In this guide, I’ll share my experience and provide you with a step-by-step approach to installing vinyl flooring around your toilet.
Understanding Vinyl Flooring Installation
Vinyl flooring is a popular choice for bathrooms because it’s waterproof, durable, and relatively easy to install. Unlike ceramic tiles, which require grout that can trap moisture and become moldy, vinyl flooring forms a seamless surface, making it ideal for humid environments. There are two main types of vinyl flooring: sheet vinyl and luxury vinyl plank (LVP) or tile (LVT). Sheet vinyl comes in large rolls, while LVP/LVT comes in individual planks or tiles. Both are excellent options, but the best choice depends on your preferences and budget.
Cutting Vinyl Flooring Around the Toilet
The key to installing vinyl flooring around your toilet is precise cutting. You’ll need to measure the space carefully and cut the flooring pieces to fit snugly around the toilet base. Using a utility knife and a cutting mat, you can achieve clean and straight cuts. Remember to leave a small gap between the flooring and the toilet for expansion and contraction. This gap should be about 1/8″ to 1/4″ wide. You can fill it in with caulk after the installation is complete.
Vinyl Flooring Installation Steps
Here’s a detailed breakdown of the steps to install vinyl flooring around your toilet:

Image: phenergandm.com
1. Prepare the Subfloor
Start by preparing your existing floor. If you have old tiles or linoleum, remove them. Make sure the subfloor is smooth, level, and free of debris. You might need to apply a leveling compound to even out any uneven areas.
2. Measure and Cut
Carefully measure the space around the toilet and cut your vinyl flooring pieces accordingly. It’s essential to leave a small gap between the flooring and the toilet base. This will allow the flooring to expand and contract without causing buckling. Mark the flooring pieces with a marker to help you align them and make accurate cuts.
3. Install the Flooring
Depending on the type of vinyl flooring you’ve chosen, the installation process might slightly vary. For sheet vinyl, you’ll use a thin adhesive to secure it to the subfloor. For LVP/LVT, you might use a click-and-lock system or utilize adhesive for a more permanent installation.
4. Trim and Finish
Once the flooring is laid, carefully trim any excess material around the toilet base using a utility knife. Apply sealant or caulk around the toilet base to cover the gap and create a watertight seal. Finally, install molding or trim to cover the edges of the flooring for a cleaner aesthetic.
5. Final Touches
After the installation is complete, give your flooring a final cleaning to remove any debris or dust. You’re now ready to enjoy your beautifully renovated bathroom.
Expert Tips for Vinyl Flooring Installation
Based on my experience and research, here are a few tips to ensure a smooth and successful vinyl flooring installation around your toilet:
1. Invest in a Quality Floor Leveler
Using a high-quality floor leveler will ensure that your subfloor is perfectly even, which is crucial for a seamless and long-lasting vinyl flooring installation.
2. Consider a Moisture Barrier
In humid environments like bathrooms, adding a moisture barrier to the subfloor provides an extra layer of protection against water damage and can help prevent issues in the long run.
Commonly Asked Questions
Here are answers to frequently asked questions about installing vinyl flooring around a toilet:
Q: Do I need specialized tools for this project?
A: While basic tools like measuring tapes, a utility knife, and a level are essential, you might also need a wet saw for cutting LVP/LVT planks and a flooring roller for ensuring the flooring is properly adhered to the subfloor.
Q: What if the gap between flooring and the toilet is too big?
A: If the gap is larger than 1/4″, you can use a flexible molding or caulk with a thicker consistency to fill it in and create a watertight seal.
Q: Is it possible to completely avoid cutting around the toilet?
A: While it’s technically possible to install some types of vinyl flooring without cutting around the toilet, it might involve using a non-standard size or shape, which could make it difficult to find the flooring you want.
How To Install Vinyl Flooring In Bathroom Without Removing Toilet
Conclusion
Installing vinyl flooring in your bathroom without removing the toilet is achievable with careful planning, precision cutting, and the right tools. Remember to invest in quality materials, measure accurately, and utilize expert tips to ensure a successful and beautiful outcome. Are you ready to transform your bathroom with new flooring without any major plumbing headaches? Let us know in the comments if you have any questions or further inquiries about this project.


/GettyImages-173599369-58ad68f83df78c345b829dfc.jpg?w=740&resize=740,414&ssl=1)


