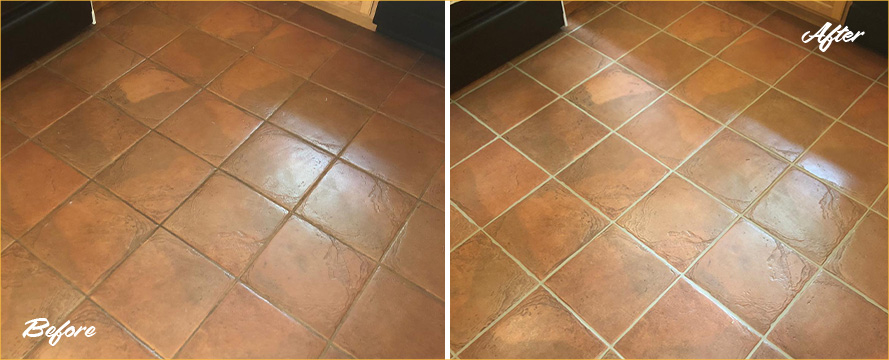
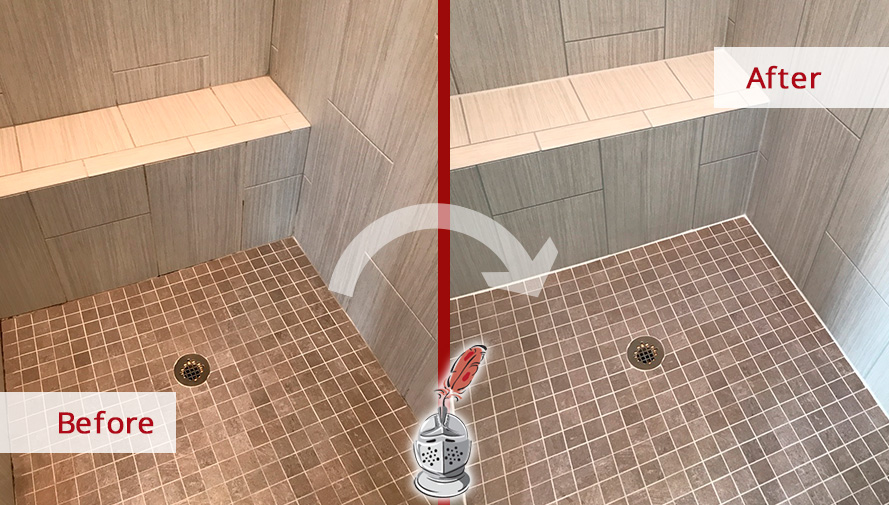
Imagine this: you’ve just finished painstakingly tiling your kitchen floor, meticulously choosing the perfect grout color to complement your design. The gleaming tiles reflect light, and you’re overjoyed with the results. But as time passes, you notice something: the grout is starting to look dull, stained, and even worse, it’s letting in dirt and grime. This is where the importance of grout sealing comes into play, a crucial step often overlooked in the tiling process.

Image: dragon-upd.com
Sealing your grout is like putting on a protective shield for your tiles. It not only enhances the appearance of your floors but also safeguards them from everyday wear and tear, making them easier to clean and maintain. This guide will take you through the steps of sealing grout in floor tiles, ensuring your floors stay looking their best for years to come.
Understanding Grout Sealing: The Crucial Protective Layer
Grout is the mortar used to fill the gaps between tiles, ensuring a solid and waterproof surface. While it holds your tiles together, grout itself is porous, making it susceptible to dirt, grime, oil, and even mold growth. Grout sealer acts as a barrier, preventing these substances from penetrating the grout and causing discoloration or damage. It also helps repel water, making your floors easier to clean and preventing the formation of mildew and mold.
There are mainly two types of grout sealers: solvent-based and water-based. Solvent-based sealers are known for their durability and are often preferred for high-traffic areas. However, they tend to have a strong odor and require thorough ventilation during application. Water-based sealers are typically less durable but are easier to apply and have a lower odor. They are suitable for residential applications and less demanding environments.
The Step-by-Step Guide to Sealing Your Grout
1. Preparing Your Floor: Getting Ready for Sealing
Before diving into sealing, it’s essential to prepare your floor for the process. Start by thoroughly cleaning the grout using a grout cleaner or a mixture of baking soda and water. Thoroughly scrub the areas, especially if you’ve noticed any stains or dirt buildup. Rinse the grout well with clean water and allow it to dry completely.

Image: dragon-upd.com
2. Choosing the Right Sealer: A Match Made in Tile Heaven
Choosing the right sealant is critical for successful results. Consider the type of grout you have (epoxy, cement, or sanded grout). Epoxy grout is naturally more resistant to stains, while cement grout requires sealing. Select a sealer specifically designed for your grout type and the location of your tiles. For high-traffic areas, a solvent-based sealer offers superior protection.
3. Applying the Sealer: The Art of Precision
Apply the sealant using a grout sealer applicator or a clean paintbrush. Work in small sections, applying the sealer in thin, even coats. Make sure to cover the entire grout line, ensuring the sealer penetrates deeply into the grout. Allow the sealer to dry completely before applying a second coat, following the instructions provided by the manufacturer.
4. Let it Cure: The Final Touches
Once the sealer is applied, it needs time to cure properly. This usually takes 24 to 48 hours, but check the manufacturer’s instructions for specific curing times. During the curing period, avoid walking or placing any heavy objects on the sealed grout. This allows the sealer to harden and provide optimal protection.
Renewing the Sealer: Maintaining Your Floors’ Shine
Over time, the sealer will wear down, especially in high-traffic areas. To maintain the effectiveness of the sealer and keep your grout looking its best, you will need to reapply the sealer periodically, typically every year or two, depending on usage. This helps prevent stains and dirt from penetrating the grout, ensuring your floors remain clean and beautiful.
Before reapplying the sealer, it’s important to give the surface a thorough cleaning, removing any dirt or grime. Reapplying the sealer is similar to the initial application, ensuring even coverage and allowing the sealer to cure properly. This consistent maintenance helps prolong the lifespan of your grout and keep your floors looking their best for years to come.
Tips and Advice from the Pros: Unlocking Grout Sealing Success
Here are some useful tips from professional tile installers and cleaning experts to help you achieve the best results when sealing your grout:
- Always test the sealer in an inconspicuous area first to ensure compatibility with your grout and tile. This helps avoid unforeseen reactions or discoloration.
- Apply thin, even coats of sealer. Avoid over-applying as this can hinder the curing process and create a sticky residue.
- Allow adequate time for the sealer to cure completely. This ensures the sealer adheres properly and provides the desired protection.
- Use a sealant designed for the specific type of grout you have. This ensures optimal performance and protects your grout from stains and damage.
- Follow the manufacturer’s instructions regarding application, curing time, and maintenance procedures for the specific sealer you choose.
FAQ: Clearing the Fog Around Grout Sealing
Q: What is the difference between grout sealer and grout cleaner?
A: Grout cleaner removes dirt, grime, and stains from the grout, while grout sealer protects it from future stains and dirt. They serve different purposes and can be combined for optimal results.
Q: How often should I seal my grout?
A: The frequency of grout sealing depends on your grout type, the level of traffic in the area, and the type of sealer used. Typically, re-sealing every one to two years is recommended.
Q: Can I use any sealant on my grout?
A: No, it’s crucial to use a sealer designed specifically for your grout type. Using the wrong sealer can damage your grout or compromise its performance.
Q: What are the benefits of sealing grout?
A: Sealing grout provides numerous benefits: it makes your floors easier to clean, prevents stains and dirt from penetrating the grout, protects against mold and mildew, and enhances the appearance of your tiles.
Q: Can I use a sealant on my grout if it’s newly installed?
A: Yes, it’s important to seal your grout once it’s fully cured, typically after 24 to 48 hours.
How To Seal Grout In Floor Tiles
Conclusion
Sealing your grout is an essential step in maintaining the beauty and durability of your tile floors. From choosing the right sealant to applying it properly, this guide has provided you with the knowledge and tips to protect your floors and keep them looking their best for years to come. Remember to follow the manufacturer’s instructions carefully and maintain a consistent schedule for resealing, and your floors will thank you for the extra care!
Are you interested in learning more about other ways to care for and upgrade your floors?


/GettyImages-173599369-58ad68f83df78c345b829dfc.jpg?w=740&resize=740,414&ssl=1)


