Have you ever dreamt of a luxurious, spa-like shower in your bathroom? Maybe you’re planning a bathroom renovation or adding a new shower altogether. But what if your bathroom is built on a concrete floor? That doesn’t mean you’re out of luck. Installing a shower drain in concrete can be a bit more complex than in a wooden subfloor, but it’s definitely achievable with the right tools and technique. Whether you’re a seasoned DIYer or a curious homeowner, this guide will walk you through the process, giving you the confidence to tackle this project.

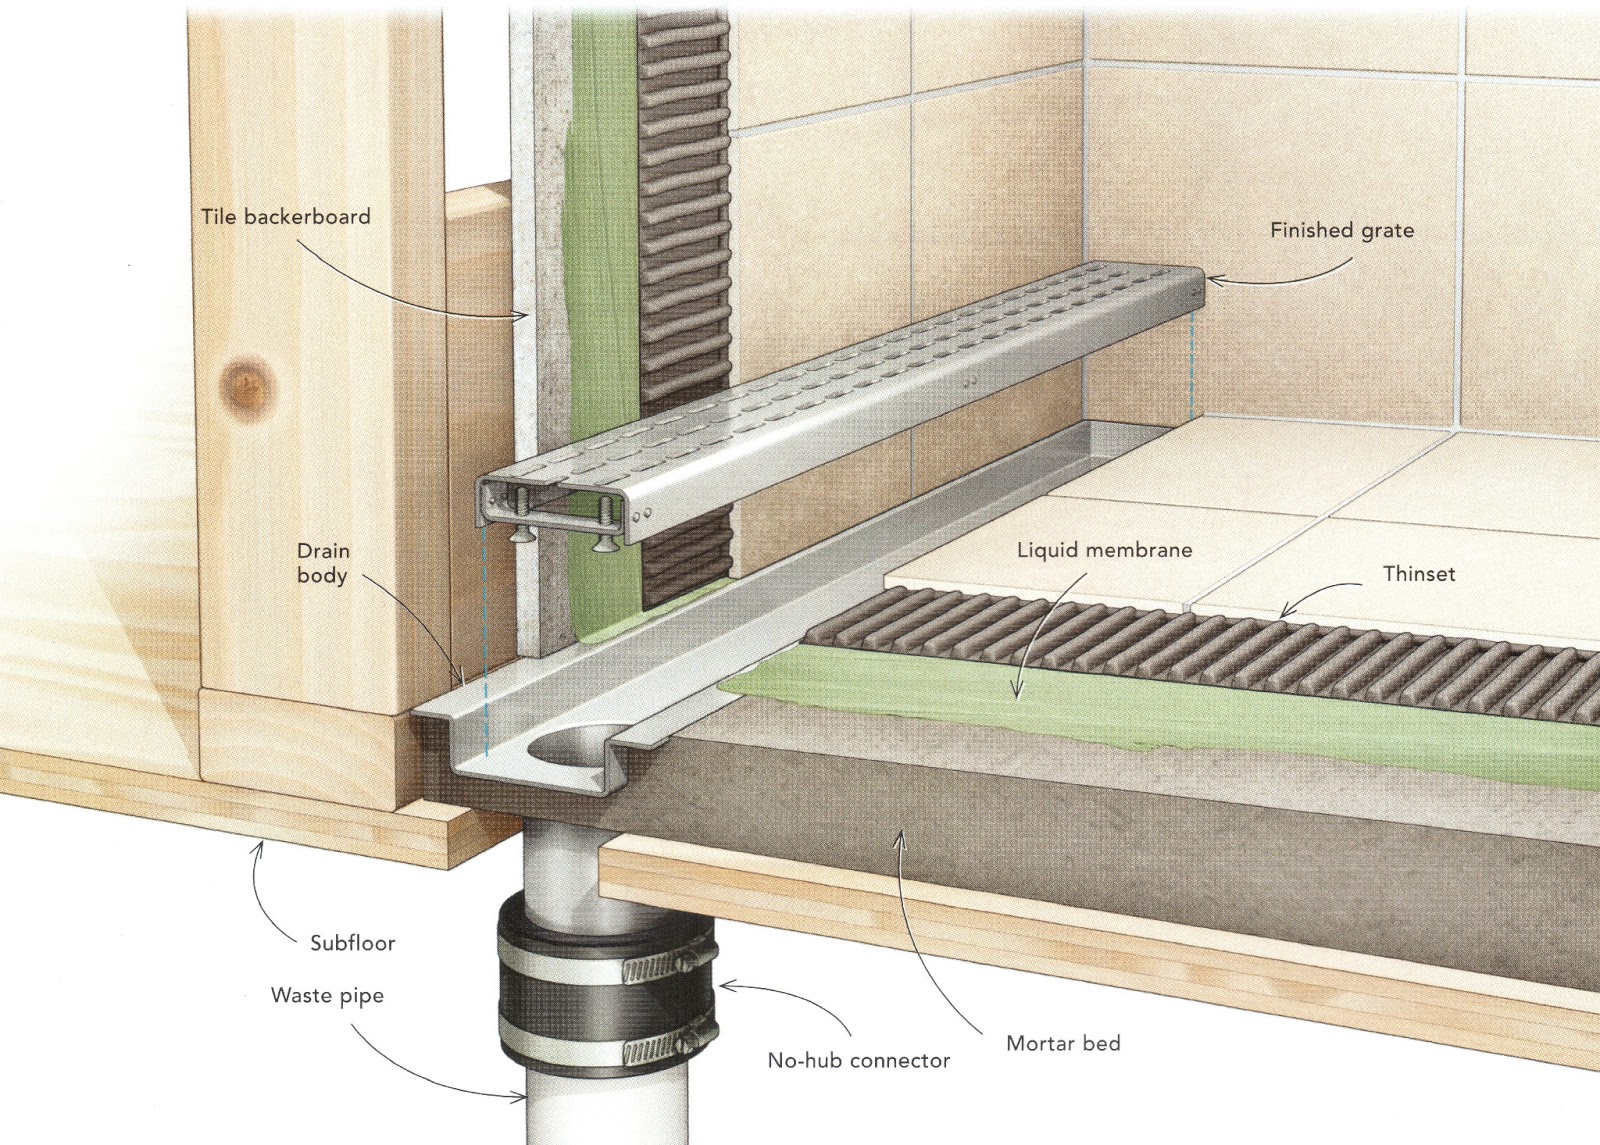
Image: laticrete.blogspot.al
I remember when I was remodeling my own bathroom. The concrete floor threw me for a loop – I wasn’t sure how I would install the shower drain. After a lot of research, I found the solution and successfully installed a drain that matched my new shower design. Now I’m ready to share that knowledge with you! So, grab your tools, let’s dive in.
Understanding the Process: Demystifying Shower Drain Installation in Concrete
Installing a shower drain in a concrete floor is a bit different than installing one in a wooden subfloor. Concrete is a solid, non-flexible material, so you need to create a secure and watertight connection. This involves careful planning, precise cutting, and the use of specific materials.
The basic steps usually include:
- Planning and Measuring: Identify the ideal location for your drain and ensure it coincides with the plumbing vent.
- Cutting the Concrete: You’ll use specialized tools, such as a diamond-tipped saw, to create an accurate opening for the drain.
- Installing the Drain Body: The drain body is secured to the concrete using a specialized epoxy or concrete adhesive.
- Connecting the Drainpipe: You’ll need to connect the drainpipe to your existing bathroom plumbing system. This may involve cutting and fitting PVC or ABS pipes.
- Testing for Leaks: Once installed, the drain needs to be thoroughly tested for leaks to ensure it’s properly sealed and functional.
Essential Tools and Materials
Before you start, gather the necessary equipment and materials:
- Shower drain kit: Choose a drain kit that’s compatible with concrete installations.
- Diamond-tipped saw: This specialized saw is the best tool for cutting through concrete.
- Concrete adhesive or epoxy: These are vital for bonding the drain body to the concrete.
- PVC or ABS pipe: Depending on your plumbing system, you’ll need either PVC or ABS pipe for connecting to the drain.
- Plumbing tools: These might include a pipe cutter, a hacksaw, an adjustable wrench, and a level.
- Safety gear: Wear safety glasses, gloves, and a dust mask to protect yourself from particles.
Step-by-Step Guide to Installing a Shower Drain in Concrete

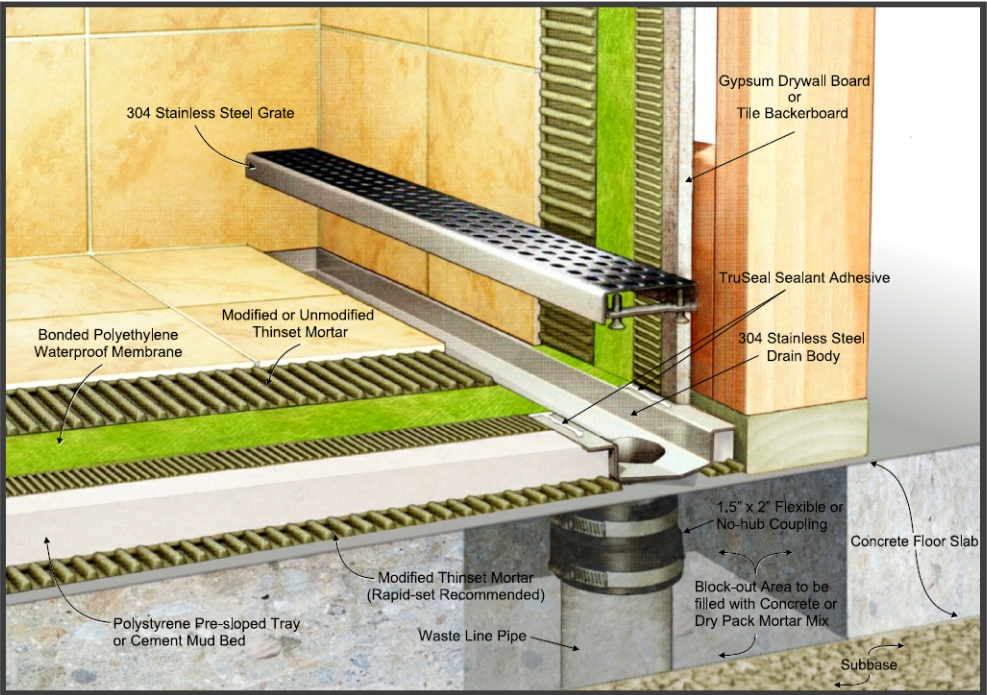
Image: www.primagem.org
1. Planning the Location and Measuring
The first step is to determine the best location for your shower drain. Consider the existing plumbing system’s position, the layout of your shower pan, and the required slope for proper drainage. Measure the precise spot where you want to install the drain. Ensure it’s centrally located and aligns with your plumbing vent for optimal function.
2. Marking and Cutting the Concrete
Using a marker, carefully outline the size and shape of the drain body on the concrete floor. Now, it’s time to bring out the diamond-tipped saw. Make sure you use a saw designed for concrete and wear appropriate safety gear. Slowly and steadily cut along the marked lines, ensuring you create a clean and precise opening. Remove the concrete debris and double-check if the opening perfectly fits the drain body.
3. Securing the Drain Body
With the opening prepared, it’s time to install the drain body. Before you apply adhesive or epoxy, ensure the drain body is clean and free of dust or debris. Carefully position the drain body into the opening, aligning it precisely. Next, follow the manufacturer’s instructions for applying the epoxy or concrete adhesive. Ensure that the adhesive fully bonds the drain body to the concrete, creating a secure and watertight connection. Allow the adhesive to cure fully according to the manufacturer’s recommendation.
4. Connecting the Drainpipe
Now you’ll connect the drainpipe to the drain body. Follow the manufacturer’s directions for connecting the drainpipe to the shower drain body ensuring a snug and watertight fit. If necessary, cut the pipe to the right length using a pipe cutter. Use plumbing glue or sealant to create a secure connection. It’s essential to ensure all pipe joints are glued securely before testing for leaks.
5. Testing for Leaks
Once the shower drain is completely Installed, you need to test it thoroughly for leaks. This is crucial to ensure your installation is successful and watertight. Fill the shower pan with water and leave it for a few hours. Check underneath the drain and the connected pipes for any signs of leakage. A dripping sound or dampness indicates a leak and requires careful examination and likely some adjustments to the installation. If you detect a leak, promptly address it to prevent potential future issues.
Tips and Expert Advice
These tips can help you further along the way:
- Choose a reputable brand: Quality shower drains from well-known manufacturers are more durable and reliable.
- Take your time: Installing a shower drain in concrete is a meticulous task. Don’t rush it to avoid mistakes.
- Double-check: Verify your measurements and connections before finalizing the installation.
- Clean as you go: Keep your workspace clean and organized to avoid debris affecting the installation.
- Use a level: Ensure that the drain is level to avoid water pooling in one spot.
- Always consult a professional: If you’re unsure about any part of the process, seek help from a licensed plumber.
Remember, even with these tips, it’s essential to always prioritize safety. Wear protective gear, use the right tools, and consult instructions carefully.
FAQs
Q: Can I install a shower drain in concrete without cutting?
A: Unfortunately, no. You cannot install a shower drain without cutting through the concrete slab to create an opening for the drain body.
Q: What happens if I don’t use a diamond-tipped saw?
A: Using a conventional saw on concrete can be challenging and potentially dangerous. These saws may not be able to cut through concrete effectively, and the damage could compromise the structural integrity of the slab. It’s always safest and most effective to use a specialized diamond-tipped saw designed specifically for cutting through concrete.
Q: Can I use regular plumbing sealant instead of adhesive for the drain body?
A: While regular sealant can be used for some plumbing applications, it may not provide the necessary strength and waterproof seal for a shower drain installation in a concrete floor. It’s essential to use a specialized epoxy or concrete adhesive formulated for bonding drain bodies to concrete, ensuring a secure and watertight connection.
How To Install Shower Drain In Concrete Floor
Conclusion
Installing a shower drain in a concrete floor may seem daunting, but with careful planning, the right tools, and this step-by-step guide, you can successfully complete the project. Remember, taking your time, double-checking your work, and prioritizing safety are essential to achieve a reliable and functional shower drain.
Have you ever installed a shower drain in a concrete floor? Share your experiences and tips in the comments below!


/GettyImages-173599369-58ad68f83df78c345b829dfc.jpg?w=740&resize=740,414&ssl=1)


