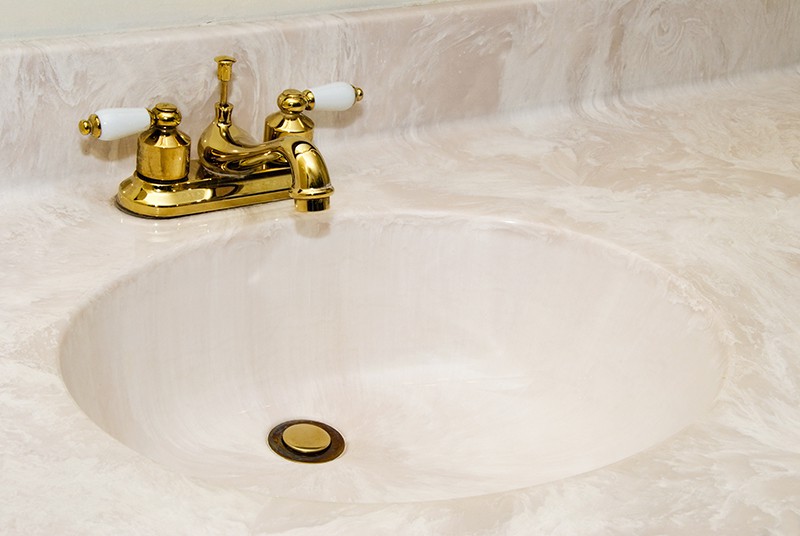
Have you ever gazed upon a beautiful cultured marble countertop and dreamed of giving your own space a similar luxurious upgrade? Perhaps you’re tackling a bathroom remodel or simply want to add a touch of elegance to your kitchen.

Image: www.pinterest.com.au
Cultured marble, with its beautiful veins and easy-to-clean surface, is a popular choice for both residential and commercial spaces. But whether you’re a seasoned DIYer or just starting your home improvement journey, cutting cultured marble can feel daunting. Don’t worry, this comprehensive guide will equip you with the knowledge and confidence to tackle this task like a pro.
The Allure of Cultured Marble: A Material Unveiled
Cultured marble, also known as synthetic marble, is a composite material that captures the elegance of natural stone while offering practical benefits. Composed of a blend of marble dust, resin, and pigments, cultured marble is durable, affordable, and remarkably versatile. Its smooth, non-porous surface repels stains and bacteria, making it an excellent choice for kitchen countertops, bathroom vanities, and shower surrounds.
But its beauty goes beyond its practicality. Cultured marble comes in a wide array of colors and patterns, allowing you to seamlessly blend it with any design aesthetic. Whether you prefer the classic elegance of white marble or the bold drama of black granite, you’ll find a cultured marble option to perfectly complement your vision.
Cutting Cultured Marble: Unveiling the Process
Cutting cultured marble is a straightforward process when you understand the tools and techniques involved. Here’s a step-by-step guide to ensure success:
1. Planning and Preparation:
- Safety First: Always prioritize safety. Wear safety glasses, gloves, and a dust mask to protect yourself from flying debris and dust.
- Measure Twice, Cut Once: Accurate measurements are crucial. Use a measuring tape and a pencil to mark the cutting line precisely on the cultured marble.
- Support Matters: Ensure the marble sheet is firmly supported to prevent movement during the cutting process. A sturdy workbench or sawhorses are ideal.
2. Choosing the Right Tools:
- Circular Saw: A circular saw with a diamond blade is the preferred tool for cutting cultured marble, especially for straight lines. The diamond blade’s sharpness and durability ensure clean, precise cuts.
- Jigsaw: A jigsaw with a fine-tooth blade is another excellent option, particularly for intricate shapes and curves.
- Score and Snap Method: For straight cuts, a scoring tool like a glass cutter or a utility knife can be used to score the surface, followed by gently snapping the marble along the scored line.
3. The Cutting Process:
- Diamond Blade Essential: When using a circular saw or jigsaw, always use a diamond-tipped blade specifically designed for cutting hard materials like marble.
- Steady Hands: Cut slowly and carefully, maintaining a consistent pace. Avoid applying excessive pressure, as this can cause the blade to stall or break.
- Clean Cuts: Once the cut is complete, use a sanding block or emery board to smooth any rough edges and prevent chipping.
4. Working with Curves and Angles:
- Jigsaw for Curves: A jigsaw is the ideal tool for cutting complex shapes and angles. Use a blade designed for curves and move slowly, gently guiding the tool along the cutting line.
- Template Technique: For precise cuts, consider using a template. Place the template on the marble sheet, trace the outline, and carefully make the cut following the template markings.
- Dust Extraction: Use a vacuum cleaner or a dust collector to remove dust and debris from the work area, keeping your workspace clean and organized.
5. Finishing Touches and Polishing:
- Smooth Edges: Once the cut is complete, smooth any rough edges using sandpaper or a polishing pad. This prevents chips and ensures a clean, professional finish.
- Polishing for Luster: If desired, you can polish the cut surface of cultured marble to enhance its shine and brilliance. A diamond polishing pad or specialized marble polishing compound work well for this task.
6. Tips and Tricks:
- Practice Makes Perfect: Practice on scrap pieces of cultured marble before cutting the final piece to familiarize yourself with the tools and techniques.
- Water Cooling: When using a circular saw or jigsaw, periodically apply water to the diamond blade to prevent overheating and extend its lifespan.
- Dry Cuts: While wet cuts may reduce dust, dry cuts with a high-quality diamond blade often yield cleaner and more precise results.
Expert Insights: Unveiling the Professional Touch
To gain deeper insights, we reached out to veteran marble fabricators for their expert advice:
Master Craftsman, Julian Garcia: “When working with cultured marble, accuracy is key. Take your time, measure precisely, and ensure you have the right tools. A good-quality diamond blade is your best friend. Start with a slow and steady cut, and slowly increase the speed as you gain confidence.”
Experienced Contractor, Sarah Miller: “Always wear appropriate safety gear and work in a well-ventilated area. When cutting cultured marble, the dust produced can be irritating to the lungs. Make sure to clean up any dust residue thoroughly after completing the project.”

Image: www.homenish.com
How To Cut Cultured Marble
Empowering Your Next Project: Actionable Takeaways
Whether you’re creating a custom shower surround or adding a unique touch to your kitchen, cutting cultured marble is a skill that adds to your DIY arsenal. By following these steps, you’ll be able to tackle this project with confidence and achieve a polished, professional look.
Now you’ve gained the knowledge, so what are you waiting for? Take the plunge and embark on your own cultured marble cutting journey.
Remember, your next home improvement project is just a cut away!


/GettyImages-173599369-58ad68f83df78c345b829dfc.jpg?w=740&resize=740,414&ssl=1)


