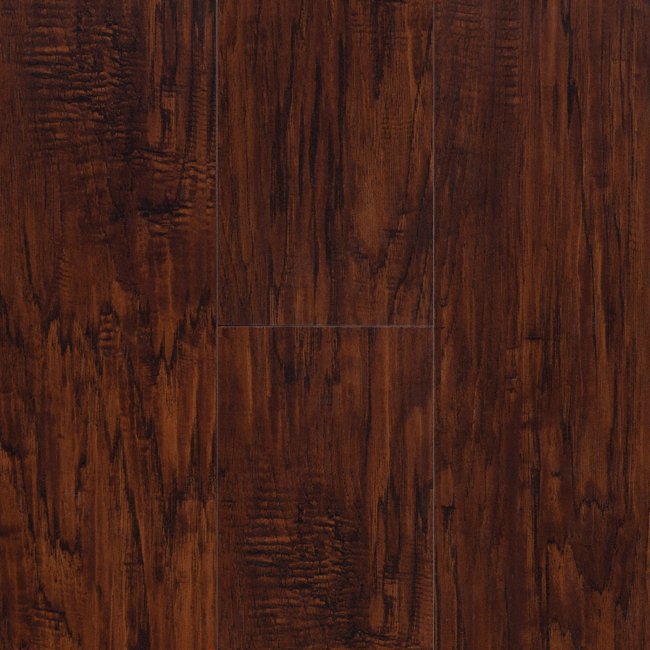
Imagine walking into your newly renovated home, the sun streaming through the windows and illuminating the gleaming floors. You’ve chosen vinyl plank flooring for its durability, ease of maintenance, and stylish look, but there’s just one lingering question: does it need to be staggered? You’ve heard whispers about “brickwork” patterns and “running bond,” but what does it really mean?

Image: wittylandlord.com
This question is more than just an aesthetic preference. It’s about achieving a professional-looking finish, ensuring long-lasting performance, and minimizing the risk of costly mistakes. In this guide, we’ll unravel the mystery behind staggering vinyl plank flooring, explore its benefits, and provide actionable tips for perfect installation.
The Art and Science of Staggering Vinyl Plank Flooring
Staggering vinyl plank flooring, also known as offsetting or creating a brickwork pattern, is a common practice that involves placing each plank so that its ends don’t align with the planks in the row above or below.
Think of it like building a brick wall. Each brick is offset to create a strong, interlocking structure. Similarly, staggering vinyl planks creates a more robust, visually appealing floor that’s less susceptible to shifting or buckling over time.
Why Stagger? The Benefits Unveiled
There are several reasons why staggering vinyl planks is considered a best practice:
1. Enhanced Stability: By creating an interlocking pattern, offsetting planks prevents them from moving or shifting under foot traffic. This is crucial for maintaining a smooth, even floor surface that looks great and feels comfortable to walk on.
2. Reduced Gaps and Cracked Grout: Unlike traditional tile, vinyl planks don’t have grout lines that can crack or become discolored over time. However, without staggering, gaps between planks can become noticeable, disrupting the flow and aesthetics of the floor. Staggering minimizes these gaps, achieving a more seamless appearance.
3. Improved Durability: Staggering contributes to long-lasting performance by distributing weight evenly across the floor. This helps prevent individual planks from bearing too much strain, reducing the risk of scratches, dents, and other damage.
4. Enhanced Visual Appeal: The staggered pattern creates a dynamic and visually interesting floor that adds depth and character to any space. It complements a wide range of design styles, from minimalist to traditional, enhancing the overall aesthetic appeal of your home.
Understanding the Installation Process
Now that you understand the benefits of staggering, let’s dive into the installation process:
1. Choose the Right Pattern: There are several common staggering patterns, including:
* **Running Bond:** This is the most popular pattern and involves offsetting each plank by half its length. It creates a simple yet elegant look, similar to traditional brickwork.
* **Brickwork Pattern:** This pattern creates a more complex and intricate design, using alternating staggered planks to form a visually appealing, geometric layout.
* **Diagonal Pattern:** This pattern places planks at a 45-degree angle, adding a modern and dynamic touch to the floor. It can be more complex to install but creates a truly striking effect.
2. Plan Your Layout: Before you begin, create a layout plan for your floor. This will help you visualize the pattern and ensure you have enough materials on hand. It’s a good idea to experiment with different patterns on paper or using a digital floor planner app to find the one that best suits your vision and space.
3. Start with a Straight Line: Begin your installation by laying the first row of planks against a wall, ensuring it’s perfectly straight and level. Use a level to adjust if necessary. Remember that any imperfections in the first row will carry through the entire floor, so accuracy is crucial.
4. Offset Each Row: When laying the second row, offset the planks by half their length (for a running bond pattern) or according to your chosen pattern. This staggered arrangement ensures that no seams align in consecutive rows.
5. Secure the Planks: Most vinyl planks use a click-lock system, which allows them to be easily snapped together and secured without the need for glue or nails. However, it’s important to follow the manufacturer’s instructions and use any recommended tools for a smooth and flawless installation.

Image: howthickvinylwoodflooring.blogspot.com
Expert Insights and Actionable Tips
Here are some additional tips from experienced flooring installers:
- Consider Underlayment: Use a good-quality underlayment to provide extra cushioning, noise reduction, and support for your vinyl planks.
- Trim Edges Carefully: When you reach the end of a row, you might need to trim the planks to fit. Use a sharp utility knife to create a clean, straight cut for a seamless finish.
- Leave Expansion Gaps: Always leave a small expansion gap (typically 1/4 inch) between the planks and walls or stationary objects. This allows for natural expansion and contraction due to temperature changes, preventing buckling and warping.
- Hire a Professional: If you’re not comfortable with DIY flooring installation, consider hiring a professional installer. They have the expertise and tools to ensure a proper installation and avoid potential pitfalls.
Does Vinyl Plank Flooring Need To Be Staggered
Conclusion
Staggering vinyl plank flooring isn’t just about aesthetics—it’s a crucial step in ensuring the longevity and performance of your new floor. By offsetting the planks, you create a more stable, durable, and visually pleasing finish. Remember to choose the right pattern, plan your layout carefully, and follow the recommended installation techniques. With a little effort and knowledge, you can achieve a stunning, professional-looking floor that you’ll enjoy for years to come.
Now, go forth and unleash your creativity! Explore different patterns, experiment with layouts, and discover how staggering can transform your space into a beautiful and inviting haven. Don’t hesitate to share your experience and create a unique masterpiece on your floor—let your creativity shine and enjoy the journey!


/GettyImages-173599369-58ad68f83df78c345b829dfc.jpg?w=740&resize=740,414&ssl=1)


