Imagine this: you’ve just moved into a beautiful home with gleaming hardwood floors – except for that one spot in the hallway that’s seen years of high traffic and wear. Its finish is dull, there are scratches, and maybe even a couple of stubborn stains. Now, you’re faced with a dilemma: should you refinish the entire floor, or is there a way to just tackle that damaged area? The short answer is, yes, you can refinish just a portion of your wood floor. But, it’s not as simple as grabbing a sander and going to town.

Image: www.pinterest.com
Refinishing a portion of your hardwood floor is a great way to save money and time compared to a full floor refinishing project. However, it requires precision and skill to ensure a seamless blend between the old and new finish. This article will guide you through the process, covering essential considerations, techniques, and potential challenges.
Understanding the Challenges of Partial Refinishing
Before you jump in with your sander, it’s crucial to understand the unique challenges of refinishing just a portion of your wood floor:
1. Matching Existing Finish:
The most significant challenge is achieving a seamless color and sheen match with your existing floor’s finish. Wood naturally varies in color and grain, and even floors finished at the same time might show slight differences in tone.
2. Blending the Transition:
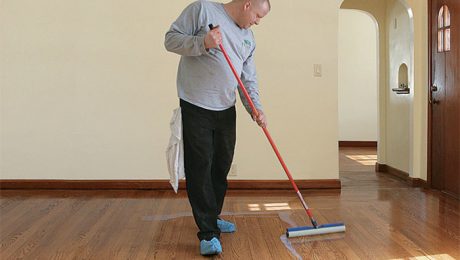
The area where your refinished section meets the original floor needs to be blended flawlessly to avoid a noticeable line. This is a delicate process that requires patience and a steady hand.

Image: www.finehomebuilding.com
3. Preventing Damage to the Existing Floor:
You’ll be working close to the existing floor, and there’s a risk of damaging it with your sander or other tools. Careful technique and protective measures are essential.
Essential Preparations:
Now that you’re aware of the challenges, let’s prepare for the job:
1. Define the Area:
First, clearly define the area you’ll be refinishing. Consider the extent of the damage, and aim for a slightly larger area than just the problem spots – this will make blending easier.
2. Protect the Surrounding Area:
Cover surrounding areas with drop cloths or masking tape to prevent dust and damage.
3. Prep the Surface:
Thoroughly clean the area to be refinished to remove dirt and grime. Use a wood cleaner, followed by a tack cloth to pick up dust.
4. Evaluate the Existing Finish:
Carefully inspect the existing floor’s finish. Determine the type of finish (oil-based, water-based, or polyurethane), and if it’s a stain or a clear coat.
5. Test the Stain and Finish:
In a hidden area, test your chosen stain and finish to make sure you’ve achieved the desired color match and sheen. Allow it to dry completely and compare it to the existing wood.
The Refinishing Process:
1. Sanding:
Use progressively finer grit sandpaper; start with a coarse grit to remove the existing finish and level any imperfections. Then, move onto finer grits to create a smooth, even surface.
2. Staining:
If you’re using a stain, apply it evenly to the sanded area. Carefully follow the manufacturer’s instructions regarding drying time and application techniques.
3. Finishing:
Apply multiple coats of your chosen finish, letting each coat dry thoroughly before proceeding.
4. Blending:
Here’s the crucial stage where you combine the refinished area with the existing floor:
- Light Sanding: With very fine grit sandpaper, gently sand a small area along the edge of the refinished section to create a transition point.
- Sanding Block: Use a sanding block to ensure consistent, even blending.
- Feathering: Gradually reduce the pressure as you move away from the refinished area to create a subtle transition.
- Finish Application: Apply a thin coat of finish along the transition zone. This will help the two areas blend together.
Common Mistakes to Avoid:
Refinishing part of a wood floor can be tricky. Here are a few common mistakes to avoid:
- Using a Too Coarse Grit: If you use a too coarse grit, you risk damaging the existing floor and creating a noticeable transition line.
- Not Using a Sanding Block: A sanding block helps you apply consistent pressure and prevent divots in the wood.
- Rushing the Blending Process: Take your time with blending. It’s better to work slowly and carefully than to rush and create a visible transition.
- Not Protecting the Surrounding Area: Dust from sanding can wreak havoc on other areas of your home.
Expert Advice:
If you’re not confident in your DIY skills, consider hiring a professional for this project. A professional wood floor refinisher will have experience matching finishes and blending seamlessly, ensuring a high-quality result.
To find a qualified professional, search reputable local companies or get referrals from friends or neighbours.
Can You Refinish Part Of A Wood Floor
Conclusion:
Refinishing part of your wood floor can be a rewarding project. It’s a more budget-friendly option than a full floor refinish and can effectively disguise wear and tear. However, it requires care, precision, and potentially some specialized tools.
By understanding the challenges and following the steps outlined here, you can achieve a professional-looking result. And remember, if you’re not sure about tackling the job yourself, consider seeking expert help from a professional wood floor refinisher.


/GettyImages-173599369-58ad68f83df78c345b829dfc.jpg?w=740&resize=740,414&ssl=1)


